June 27, 2014

Poppy explosion


I just can't get enough of these bold beauties. They are so preciously short-lived but I just love the intense color. What a delight to look out the window and see they have suddenly bloomed!

PS These actually bloomed the first week of June for me.

June 25, 2014

Growing, growing, growing!

Last year I vowed to do a series documenting the amazingly rapid growth of my favorite bleeding heart plant. By the time that occurred to me we were already at the small bush stage. Next year I want to try and start earlier and get the very first shoots poking up.

However, it has still been a fun series for me. I've been taking a photo of Friday for a few weeks and you can see what kind of explosive growth it undergoes.

May 2

May 9

May 16

May 23

May 31

Bleeding hearts prefer shade. They are perennials so they come up every year and, in my experience, get bigger each year. And they are so lovely with their delicate dangling blossoms. I would recommend planting one if you've got a shady nook to fill.

June 23, 2014

More quilt progress


I am pre-writing this post much earlier in June before baby is born. Crawling around on the floor arranging squares and pinning them: difficult. Sitting at my machine sewing: pleasantly not difficult. I would love to get the whole quilt top finished before baby is born but that is looking less likely with every day that passes!

I have to confess the yellow was more difficult for me than the pink. I had less patterned fabrics and more solid shades. I can see now that the fabric with the blue birds (same as my sunroom curtains!) reads more as blue than it does as yellow but this does not bother me because I dearly love that fabric and because it picks up and will pick up blues elsewhere in the quilt.

Three-year-old daughter helped me arrange the patch squares and really had confidence in her choices. Six-year-old daughter helped me lay out the rows again and was very thoughtful as we worked through some difficulties. Moving one square always means moving another and sometimes in solving one design issue we would create another. She stuck with it until I was happy with the result though.

Anyway, I am still pleased with how it is coming along.

June 20, 2014

Glow sticks


I took these photos earlier in the spring before my lily of the valley plants had opened and bloomed. Don't the tips look like they are on fire? I love the glow of sunlight at the day's end.

June 18, 2014

Fabric finds!


While on my anniversary adventure, my husband and I checked out some antique shops which is where I really found my treasures.

At one shop I bought three large pieces of vintage fabric. Two are patterned and one is this really awesome silk screen of a poppy by Alfred Shaheen who apparently made his claim to fame creating classy Hawaiian print shirts. I found this board on Pinterest dedicated to his pieces and this listing on etsy for the exact piece I found. So it seems to be from the 1960s.

I think I am going to sew a simple pocket along the top and some hems on the side and bottom. I'd like to slide a dowel or a piece of driftwood in the top pocket and just hang it up in my sunroom. That leaves me with a whole extra piece of it and I had the thought that it would make an awesome quilt. The giant poppy smack dab in the middle and some cool quilt squares around the border – greens and oranges and other fabrics printed with poppies. Could be really fun! Check back with me in 5 years to see how that project is going!

I had no reason to buy orange fabric with chickens. I just liked it!

I will be using this on my daughter's quilt soon!

June 16, 2014

Adventures in art


In May my husband and I headed off on a weekend away to celebrate our anniversary. He always surprises me and makes all the plans himself. This year he very generously planned our trip around a huge craft show and art show that happen simultaneously in East Lansing. I should mention that of the two of us I am the one with interest in art. He doesn't really share it but like a good spouse he'll share the experience of it with me. So like I said, very generous.


Besides the weekend event, there is a new(ish) art museum on the campus of Michigan State University that I have been talking about seeing for a year or so now. So that, the Eli and Edythe Broad Art Museum, was actually our first stop. The architecture alone is worth a visit. It is awesome and angular and so very foreign among the more traditional brick buildings. I loved it!


The interior gallery space reminds me a lot of Grand Rapids' own UICA – odd shaped, cement walls, an interesting challenge to any artist showing site-specific works there.

I do want to point you to this article (with pics) on artist Imran Qureshi. His work was very interesting and somewhat disturbing but from a marketing standpoint it was kind of neat to come across it painted on sidewalks throughout town.


My very favorite piece was Border Unseen by Mithu Sen. It is made of fake teeth and something pink that looks like your gums. It stretched through a long narrow space like a dinosaur's spine. The walls were painted the same shade of pink. And if you looked carefully there were tiny little figurines perched amongst the teeth. Was it strange? Absolutely! Disturbing? Absolutely! Awesome? Absolutely! I love weird modern art that looks absolutely nothing like anything I've ever seen before. What a challenge and an inspiration to my own visual dictionary.

There was also an exhibit of quilts from Pakistan and East India that I appreciated. The level of skill was astounding.


June 13, 2014

I think they're pretty


My daughters love to give them to me. I choose to see dandelions as gifts, not as nuisances.

June 11, 2014

shelf style: red and teal and vintage


My mother gifted me with a lovely teal glass vase (an estate sale treasure!) so I created this new shelf arrangement just to show it off.


The blue glass bottle on the left was intended to be upright but it is just a smidge too tall for the shelf. No matter, I laid it on its side.

I have always been a sucker for driftwood so I've got interesting piece in my stash to work with.

The art in the background was created by my oldest daughter when she was two (picture two paint-covered hands swirling circles side by side). The berries are usually a Christmas thing but worked well with all the round objects and to repeat the red color.

Also tipped on its side front left is an antique jar that belonged to my great-grandmother. I am not sure what was in it but I do love the pretty lid.

The milk glass vase comes from my husband's grandmother. And the blue glass vase with stopper is something I have had for quite a while. I think it was ordered from West Elm once upon a time.

June 9, 2014

old windows and chalkboard frames in progress


In a burst of spring cleaning/nesting I have given away most of my old window frames. I kept two and got them going. One I am sealing with a coat of fresh white paint and I intend to put black and white photographs in it. I have a wall of black and white art in my basement (the wall itself is red, such a great color scheme if I do say so myself). The other I am going to turn into a chalkboard for the kiddos but first I painted it the same great teal as my kitchen. I want to let that teal paint get nice and dry and hard before I put paint tape on it and do the chalkboard paint.


I have a great vision of having a whole chalkboard gallery for my kids to draw on. Originally my thought was to paint the chalkboard squares right on the wall and hang empty frames over them. Then I discovered via Pinterest that you can just paint right on the glass and thought that made much more sense! If you are interested, I found this blog post comparing brush-on chalkboard paint to spray-on chalkboard paint most helpful. I already have a can of the brush-on version so we are sticking with that.

So I got a whole collection of frames in the middle of being painted.* Actually, they are done. But I haven't put them back together yet. So they are in a sorry little heap. I don't think I can hang them until I get the old window chalkboard done. They are all going to be hung in the same stairwell and I need to map that out all at one time.

I am starting to think this is not a project I will get done before baby arrives so I figured I would give you a sneak peek for the time being. Oh, and I must show you my inspirations (via Pinterest of course). See it? Won't that be fun?

*Did you notice the crazy rainbow collection of colors. Gallons upon gallons? Every one of those colors is on a wall in my house somewhere! Hee!

June 6, 2014

fantastic flowering… grass?


One of the first things to flower in my garden this spring were some grasses. Every spring I seem to be surprised by something that most likely happened all the previous springs. We really just need to take time to go outside and be present with our plants, don't we?

June 4, 2014

Cut off pants = shorts + dolly sleep sack


Two days in a row my must-be-growing six-year-old tripped and fell and skinned her knee and put holes in her pants. So I decided cut-off shorts were in order! I used a pair of shorts that she already likes as my template for length and snipped away. I did decide I wanted to run a thread around the edge of the jean shorts and actually hem the other ones.

Have I ever hemmed anything before? Well, no. But I wasn't about to let that stop me from trying! The shorts turned out ok, nothing spectacular and blog-post worthy.

But I was very excited at my little mini-craft that I made with the part of the pants that was leftover. I sewed them shut at the bottom and sewed a colored thread around the top (so the sisters could tell theirs apart) and had instant doll sleeping bags. Cute – huh?

June 2, 2014

A pinterest-inspired jewelry rack


In the process of moving my two girls into one bedroom there were some organizational issues to be addressed. One of them was our crazy collection of sparkles and spangles, bows and bracelets, necklaces, rings, and other such things. All the jewelry and hairbands were not in the least bit consolidated and things were out of control. I turned to our dear friend Pinterest for inspiration and found exactly what we needed!


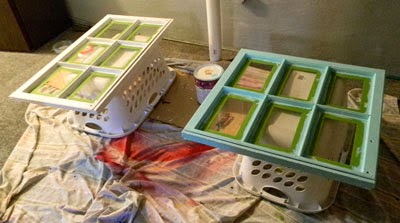
First off, we created a great jewelry holder from one of these old frames already filled in with plywood for a previous display. I was inspired by a 
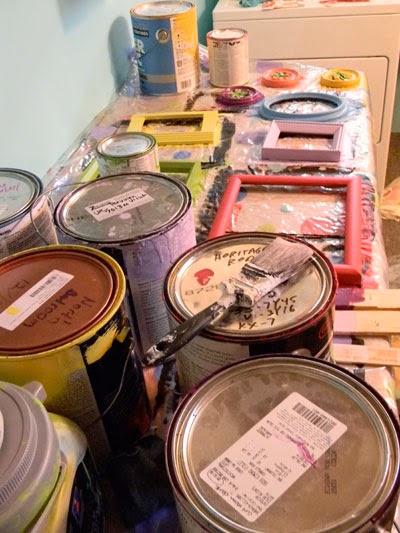
cork board and tack combo but thought I would just go ahead and use the plywood and put nails in it. Sounds simple enough – right? Well, yes and no. Stapling the fabric to the board didn't work since the staples showed through. And attaching some kind of hanging hardware to the frame turned out to be more challenging than expected. I ended ups scavanging a piece off of another thrifted frame. Dear husband built this thing like 3 times before it was actually functional. All I can take credit for is painting the frame and cutting a piece of fabric.  And having the vision, of course!

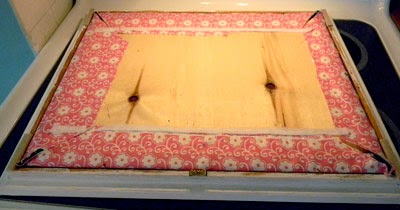
Here's the back for those who want more details:


Things to note:
• Fabric is glued to the back
• A piece of shower door stripping snugs up the fabric covered plywood and grame
• Felt pieces were added to the frame so it didn't mar the wall

Hanging next to the jewelry rack we've got a long piece of ribbon with barrettes clipped to it. Once again, thank you to Pinterest. And I totally used this idea of putting hairbands on a carabiner. It's nice because you can shift them around the loop so the one you want is near the opening. I've got two of those going stored in a bin in the girls' bathroom. Other bins store combs and brushes and small barrettes and bobby pins in clear plastic bins. Amidst my organizational frenzy my husband commented that maybe we just needed to own less barrettes. I suppose that would be an option! :-)